
My passion for travel photography has been nothing short of transformative. It has shaped my career and my family’s life over the past 15 years, and it all began in the most unlikely of ways. On my first backpacking trip around the world in 2007, I spent a year with a simple point-and-shoot camera in my hand. I had no clue about the technical side of things and certainly no handy book of travel photography tips. What I discovered I did have was a love of taking photos.
As I travelled, I came quickly to realise that, as a species, we humans share an intuitive ability to recognise a “great” photo. This universal connection we all possess is a powerful one. People with nothing in common, with totally different languages and cultural backgrounds, can take the same meaning from a photograph. A great photograph transcends language, much like great music does.
Upon my return to the UK in late 2008, I started to build my technical understanding, and this effort quickly blossomed into a career as a professional photographer. By 2010, I was well established, focusing mainly on weddings. By 2018, I had photographed nearly 500 weddings and shot assignments worldwide, including Ireland, Iceland, Australia, Malaysia and even Cuba.
The weddings were how I paid the bills, but my first love through all of this was travel photography.
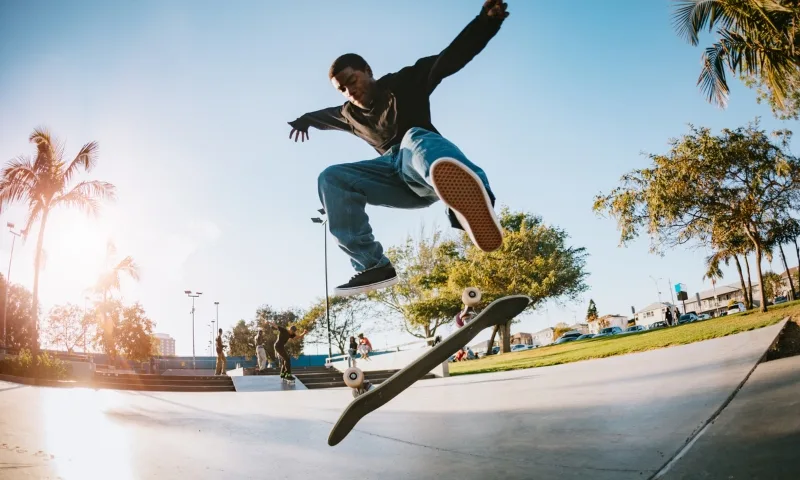
Being a travel photographer means being versatile. As you travel, you quickly get a grasp on low-light techniques, street photography, portraits, and landscapes. You find yourself as comfortable photographing under city lights as you are in sunlight, and you look for everything from tiny details to grand vistas. I hope I can pass some of this experience along to you.
Below, I have drawn up my list of essential travel photography tips. They are split into four categories to be easier to navigate: Light, Technique, Composition, and Editing. These tips will probably be most useful for beginners looking to firm up their understanding of the fundamentals, but hopefully, there are some insights here for more experienced photographers as well.
This Article is About Principles and Techniques, Not Equipment
There are few groups that obsess over their equipment as much as photographers. Having been a part of this community for over 15 years, I can say that it is almost tribal. I have witnessed fierce arguments over brands and lenses, but over time, you come to realise that really good photographers rarely talk about their gear. Instead, they talk light, and they talk technique.
So, does the gear you are using matter? To a degree, but believe me when I say you can have all the gear and still have no idea!
Certainly, if you are on assignment for National Geographic, then I would expect you to have some top-of-the-line equipment, but for most, an entry-level camera or even a phone will suffice.
Never forget, just about every photograph you have ever admired has been taken on equipment inferior to your own.
Far more important than expensive gear is an understanding of the key principles that help make stunning images.
These principles are surprisingly straightforward and easy to apply, no matter if you are using your phone or the latest mirrorless camera. Because of this, I am also not going to discuss things like manual mode, RAW files, memory cards or white balance. Certainly, as your experience grows as a photographer, you will want to explore these areas, but fundamentally, it’s your skills and creativity that truly make the difference in getting the perfect shot.
Travel Photography Tips – Light
")
Think Light
Let’s start with the most fundamental and important principle.
When you take a photograph, what are you, in the most literal sense, doing? You are graphing the photons. You are not graphing the subject.
What does this mean? When you point your camera at a subject and take a photo, you are not photographing the subject. You are photographing the light bouncing off the subject.
Therefore, if the light changes, the photograph changes, even if the subject remains the same.

Observe in the gif above that the model barely moves or changes her expression, yet as the light changes, each photo is radically different.
This is so important, so fundamental, yet you would be amazed at the number of photographers who do not understand this.
At a practical level, what this means is that the way light interacts with your subject can dramatically affect the mood and quality of your photo. To the camera and to the viewer of the photograph, the difference between the mid-day sun, mid-morning overcast light, and the sunset is huge.
A big step in improving your travel photography is to practice looking at light. When you look at a subject, is the light sharp and harsh (think midday sun on a cloudless day)? Is it soft and diffuse (think bright morning light but with a cloudy sky)? Is the light coming from a certain angle (think as the sun drops at sunset)? Think how a change in the light would change your image. This takes some effort but soon becomes second nature, and some people even get a bit obsessive! It is a huge step on your way to becoming a travel photographer.
Some types of light traditionally lend themselves to amazing photos, so try and seek out the following:
Golden Hour: The classic time of day for any beautiful image.! The golden hour, which occurs during the first hour after sunrise and the last hour before sunset, bathes your subjects in warm, soft light, creating a magical atmosphere. The light also tends to be angled from the side rather than straight above, giving a great sense of volume to the picture.
Blue Hour: This brief period just before sunrise and after sunset offers a unique bluish hue, adding a touch of enchantment to your images.
Open Shade: If shooting portraits in harsh, direct light, seek out open shade on bright, sunny days to eliminate shadows under the eyes and squinting. The shade will create even lighting for portraits and subjects.
This doesn’t mean that other types of light cannot deliver stunning results, but the above suggestions are certainly a great place to start.
Once you have started to practice looking at the light as a photographer and built an understanding of how different light affects a photo, I guarantee you will be creating much better images. If you want more information on seeing light, check out this great video by Joe Edelman.
The Eye is Drawn From Dark to Light. The Eye Is Drawn To the Strongest Contrast
This is an unusual entry in this list as it could fit under light, composition or editing. I think that just proves how important and fundamental a concept this is!
Did you know that our eyes can only see sharp detail and intense colour in the centre of our vision, but it doesn’t seem that way because they’re constantly moving?
What this means is when someone looks at a photograph, their eye scans it in a series of what is known as saccadic eye movements. These movements are rapid twitches of the eye that the brain uses to build an image. These eye movements are one of those really clever tricks that the brain does all the time without us even realising; you are probably doing it even as you read this.
As part of these movements, the eye naturally gravitates from areas of darkness to brightness, and the eye is naturally drawn to the highest point of contrast. This is such a powerful instinct in all humans that it can be manipulated incredibly subtly to great effect.
This is not new information. Artists have known about it for centuries (although they may not have understood how it works, just that it works). Take the image below:

This is “The Matchmaker” by Gerard van Honthorst, painted in 1625. Notice how the subject is the brightest point of the image and has the strongest contrast, hence why your eye goes straight to her.
This is another, much more subtle, example:

This is “Diogenes, seated before his barrel, reading from a book, a plucked hen standing behind him at right” by Ugo da Carpi and was made between 1450 and 1480.
Diogenes, seated in the foreground, has the strongest contrast and is the brightest part of the image, but only very slightly. This gently encourages the eye to wander and take in more of the image, but it always returns to the subject.
Understanding that these eye movements exist and how they can be guided can help you compose compelling and visually engaging photographs. Here is how to harness this concept in your photography:
- Contrast and Emphasis: Dark-to-light transitions create contrast, which naturally draws the viewer’s eye. To make your subject stand out, consider placing it in a well-lit area against a darker background. This contrast emphasizes your subject and adds depth to the image.
- Natural Light: When shooting outdoors, pay attention to the angle and quality of natural light. The “golden hour” during sunrise and sunset often creates stunning dark-to-light gradients in the sky and landscape.
- Post-Processing: In post-production, you can enhance dark-to-light transitions through adjustments in exposure, contrast, and dodging and burning techniques. Editing software provides opportunities to fine-tune the visual flow within your images.
Here is one of my examples; this is a fresh out-the-camera, unedited, wide shot from my drone at the golden hour:

In this unedited image, the (rather overexposed) sky is the brightest part of the frame, so your eye goes straight to it and doesn’t really move. This is the edited version:

In Lightroom, I have darkened the sky a little and brightened the foreground. I have also added more contrast to the foreground. The result: your eye spends more time investigating the image. It is much more balanced.
Remember that the eye naturally seeks contrast and direction. By purposefully using dark-to-light transitions in your photography, you can guide the viewer’s gaze, evoke emotions, and create amazing travel photos that resonate on a deeper level.
The Eye and The Camera Do Not See Light In The Same Way
The camera does not “see” the same way we do.
As I mentioned above, our brains do all sorts of clever things to the information received from the eye without us even realising it. What we see is not one picture but is instead a composite image that the brain is constantly creating and updating. Amongst other things, this composite image levels out how we perceive bright and dark areas.
When a camera “sees”, it does not have the luxury of a brain. Instead, it creates an objective image of a single moment of time. It can only see what is really there. Practically, this means when creating a photograph, the camera cannot level out the extremes of bright and dark the same way the brain does.
This means you need to be aware of the extremes of brightness in an image. When composing a photo, consider the difference between the brightest thing in your photo (usually the sky) vs. the darkest. The camera may struggle to capture both.
This is a great example courtesy of Brian Peterson:

This is the same photo but exposed differently. The image on the left is exposed to the sky, but the foreground looks too dark, and the trees have no detail. The image on the right is exposed for the foreground, but the sky is overexposed and, again, contains no detail. If you were stood there this would all look fine to your eye as your brain would merge the two without you even realising it.
At a practical level, if you are taking a photo of a group of people, have them all in the sun or all in the shade, not half and half.
Also, beware of dappled light under a tree. It looks beautiful to the eye but can leave your subject looking like a leopard.
Just as with looking at the light above, the more you practice seeing as your camera does, the sooner you will be creating awesome photos.
Back Lit Subjects
Backlighting occurs when your primary light source (like the sun) is behind your subject, often resulting in silhouettes or “burnt-out” overexposed backgrounds. While backlighting can be used creatively, it is probably the trickiest light to work with, and it is generally a good idea to avoid it unless you have a specific artistic vision in mind.

This is a backlit image from my wedding photography days. All it took was a high-powered off-camera flash, high-speed shutter sync, and convincing Jen and Kevin to get in the water!

One of the challenges of travel photography is how to safely transport your gear. From checking your bags to carrying on, I have summed up my experiences here: How To Fly With Camera Gear.
One of the challenges of travel photography is how to safely transport your gear. From checking your bags to carrying on, I have summed up my experiences here:
How To Fly With Camera Gear.
Travel Photography Tips – Technique
Keep It Simple. An Image Is Much More Likely To Fail When You Try to Do Too Much Rather Than Too Little.
In the realm of travel photography, simplicity can be your most potent tool for creating captivating and evocative images.
This can be simply summed up as less is more. When composing your shots, focus on one central subject or element that encapsulates the essence of the scene. A single, well-defined subject can convey a powerful story or emotion, drawing viewers into your image.
Work hard to spot and eliminate distractions. Remove anything that does contribute to the subject. A clean, uncluttered composition can evoke a stronger emotional response.
To practice this ask yourself, “What is this a photo of?” If your answer is more than five or six words then the odds are the image is too complicated.
Simplicity is often the key to powerful photography.

Fill the Frame With Your Subject
Filling the frame with your subject is the simplest way to avoid a muddled image and improve your travel photography. The closer you are, the fewer distractions there will be in the photo.
Again, ask yourself the simple question, “What is this a photo of?” You may answer, “this is a photo of my daughter” or “this is a photo of the sunset.” Try to make sure that your answer is what fills the frame.
If you are not sure of the answer to this question, you are not ready to take the photo.
Filling the frame means getting up close and personal with your subject, emphasizing its details and eliminating distractions. This technique is particularly effective for portraits.
Experiment With The Camera Level – Get High & Get Low.
We are used to seeing the world at our eye level, and therefore, we instinctively photograph at our eye level.
However, varying the height of your camera can be a simple but powerful technique. Want something to look big or to get a child’s eye view? Get low.
Want a wider perspective or a sense of scale? Get high.
The closer you are to your subject, the more powerful this is. If you are arm’s length away, then getting a few inches lower will have a big impact.
Beware the Background
Distracting background elements can detract from the main subject of your photo, especially when taking a portrait.
Bokeh is not camouflaged for distractions. An out-of-focus distraction is still a distraction.
It is natural to focus on your subject, but I found when composing an image, it was wise to start at the background and work forward.
Check if there is anything in the background you don’t want in the image. If so, can you “shoot around” it by blocking it with your subject or by moving the camera higher or lower?
Where is the horizon line? It should not be passing through the subject’s head.
Practice until it becomes a habit to always scan the background for unwanted objects or distractions before pressing the shutter button.
Don’t “Spray and Pray”
Avoid the tendency to take numerous shots in rapid succession, hoping that one will turn out to be the perfect shot. Instead, take your time to compose each of your travel photos thoughtfully and with intent.
You should take the picture; the picture should not take you.
Quality always trumps quantity in photography.
Try and Get it Right In The Camera
Try and get the image as close to perfect as possible when you take it. A bad habit I have seen many photographers fall into is the idea that they can “fix it in post.” While post-processing tools like Photoshop and Lightroom do offer powerful capabilities to enhance and change your photos, the foundation of a great image begins with what you capture through your lens.
Also, from experience, images “fixed in post” never look quite as good as those that were shot correctly in the first place, and you are just making more work for yourself.
To really “get it right in the camera,” focus on honing your photography skills, understanding your equipment, and paying meticulous attention to composition, lighting, and exposure. While post-processing can enhance your images, remember that the best travel photos often come from the heart of the moment, not a computer screen. So, next time you’re out capturing the world, strive for perfection right through your lens, and you’ll undoubtedly notice the difference in your travel photography.
Zoom with Your Feet, Not Your Camera
While zoom lenses are undoubtedly useful, sometimes, the best way to capture a compelling shot is to physically move closer to or farther away from your subject.
This not only allows you to control your composition more effectively but also encourages you to engage with your surroundings.
This is especially important if you are using a phone to take the image, as the digital zooms tend to be terrible.
Be Culturally Aware
Travel photography often involves capturing the essence of a place and its people. In this, cultural awareness is not just a virtue; it’s an essential element that can elevate your images and deepen your understanding of the places you visit.
It’s crucial to be respectful and culturally sensitive when photographing locals and their customs. Always ask for permission when taking portraits, and be aware of any cultural sensitivities regarding photography.
As much as possible, try to understand the local culture before you go. Observe, blend in, and use your photography as a platform to share stories that bridge cultural gaps and promote understanding. Include captions or narratives that provide context and insights into the images you capture.
By being culturally aware in your travel photography, you not only create more respectful and authentic images but also contribute to cross-cultural understanding and appreciation.
Look at Other Photographer’s Work
This might be a bit controversial, but I think there is nothing wrong with looking at what other photographers have created in a location you are planning to visit. This is especially useful if you don’t have time to do any scouting before shooting.
Taking the time to appreciate what others have done and perhaps considering how you may do it differently is a good technique to improve your own work. This is especially true for landscape photography and low-light photography.
Experiment and Practice
Cartier-Bresson famously stated that in photography, “Your first 10,000 photographs are your worst.” Happily, with the advent of digital photography, we now live in a time where anyone can take photographs at any time, so hitting the magic 10,000 has never been easier.
As you practice, experiment. Try new things, play with perspectives, edit in wild ways, seek feedback. Remember, photography is a personal journey, and there are no strict rules. Look for ways to express your unique perspective and creativity through your images.
Travel Photography Tips – Composition
Rule of Thirds
The rule of thirds is a fundamental compositional guideline in photography.
Imagine your frame divided into nine equal sections by two horizontal and two vertical lines (a bit like a noughts and crosses game). The rule suggests placing key elements along these lines or at their intersections, creating a more balanced and visually appealing composition.
The Rule of Thirds encourages you to position your subject slightly off-centre, which draws the viewer’s attention and creates a dynamic image.
Keep in mind that the Rule of Thirds is not a strict rule and is more a guideline. It’s meant to encourage creative composition and experimentation. In some cases, breaking this rule can lead to stunning and unique results. However, mastering the Rule of Thirds provides a solid foundation for improving your travel photography composition. So, next time you frame a shot, visualize that grid and use it to your advantage!
Leading Lines
Leading lines are elements within your frame that add the illusion of depth and guide the viewer’s eye towards a specific point of interest. Leading lines can take various forms, including roads, rivers, fences, bridges, or even natural elements like tree branches or shadows. Utilizing them adds depth and perspective to your photos.
Practice Identifying these lines in your environment and use them to your advantage. If you can, position your main subject at a point where the leading lines intersect or converge. This not only emphasizes the subject but also creates a harmonious balance within the composition.
Foreground, Midground, and Background
You can create layers in your composition by incorporating foreground, midground, and background elements which adds depth and dimension to your travel photographs. By taking the time to see how these interact, you can tell a richer visual story.
The foreground is the area closest to the camera within your frame. Placing interesting foreground elements can add depth and context to your photos. Look for objects or subjects that can serve as anchors or entry points for the viewer, leading their gaze into the image.
The midground lies between the foreground and background and often contains secondary subjects or elements that support the overall narrative of your photo. Such objects might be people or a landmark.
The background provides context and atmosphere and can often be the primary subject of your photo. Consider the background’s role in storytelling and how it complements the foreground and midground. The background typically consists of the landscape itself, such as mountains, lakes, or cityscapes. Ensure that the background complements the overall composition and adds visual interest.
This is another rule of composition that has been know to painters for centuries and is especially important in landscapes:
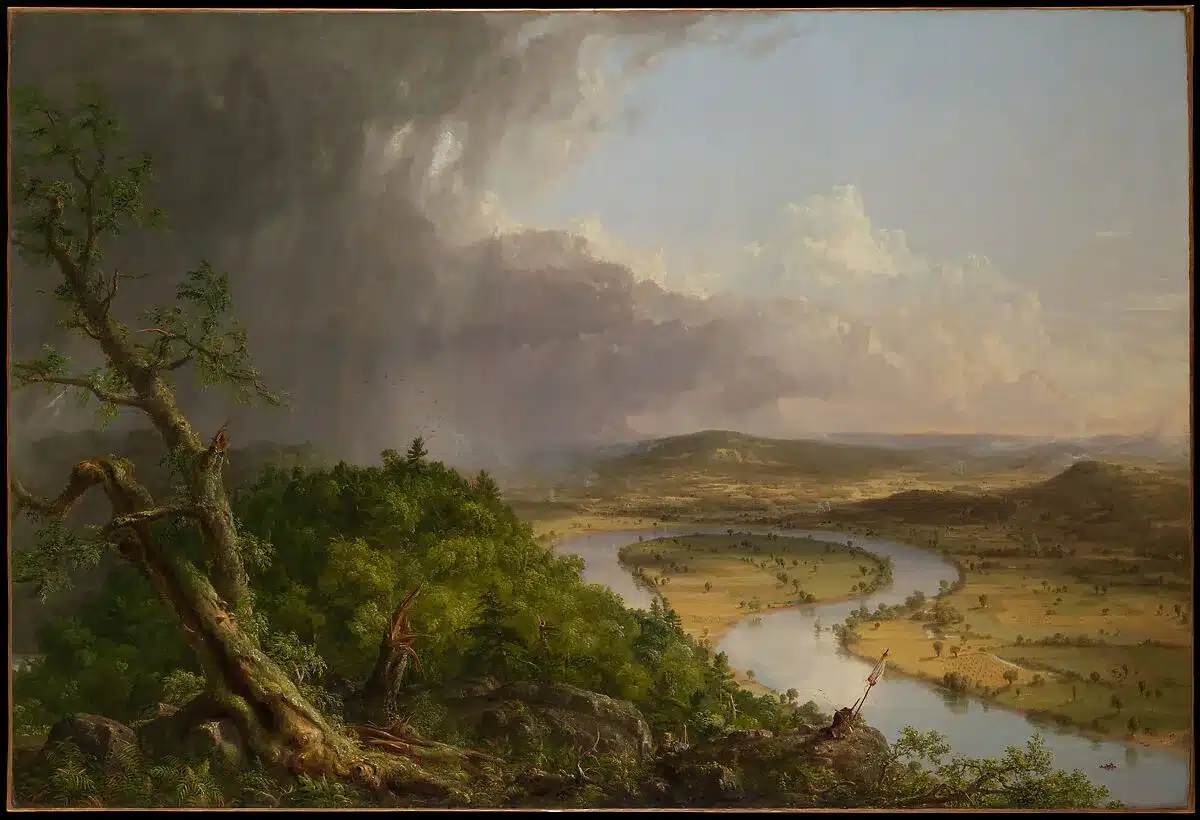
The Oxbow by Thomas Cole, 1836
And this is how it can be used effectively:
Colour
Colour is a powerful tool in travel photography, capable of conveying emotions, setting the mood, and highlighting key elements in your images. This is both a tool of composition and editing and is probably worth of its own blog post, but I feel it is most suited here.
Colour has a powerful psychological effect. Red and orange tend to be exciting, blue and green tranquil. Use this knowledge to match the colour scheme with the mood or story you want to convey.
Colours can be harmonious or can clash. How can you use this to tell a story?
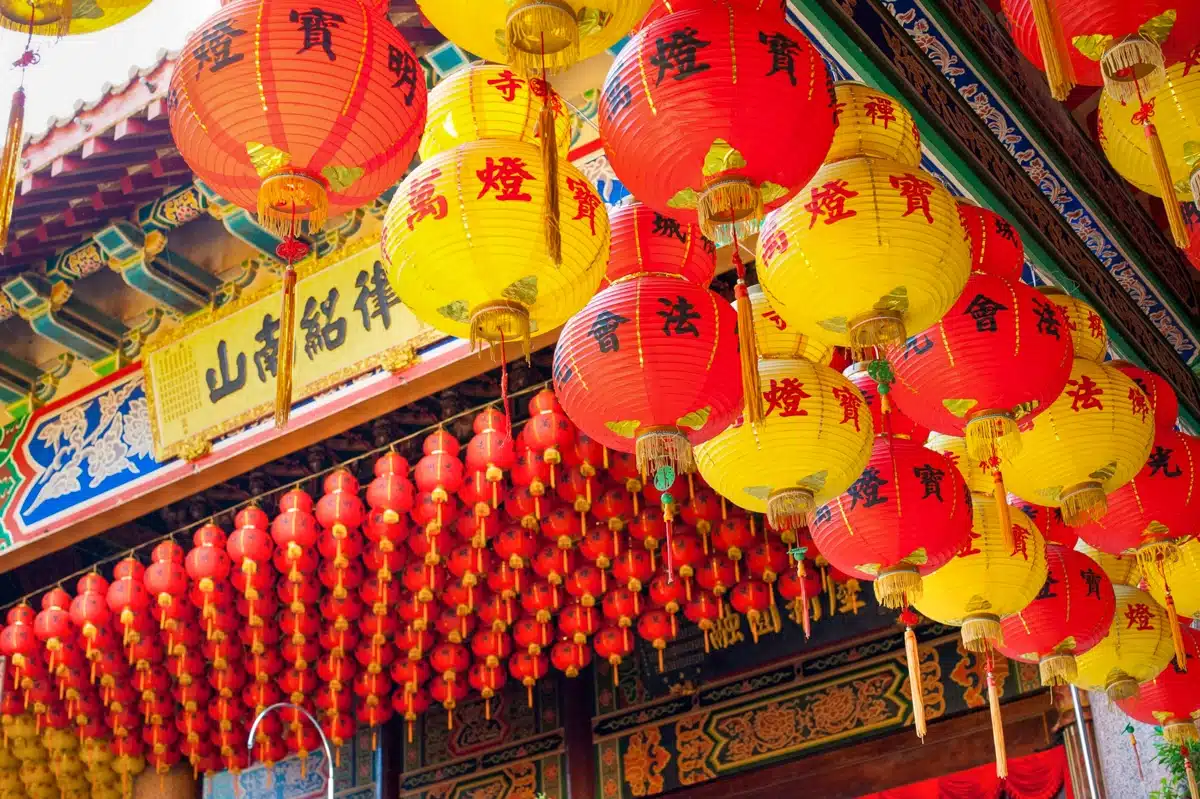
Colours can signify seasons or carry great cultural significance. Think of the orange of monks’ robes in Laos and the orange of leaves on a tree in autumn.
Just as with light, the effective use of colour requires practice and a keen eye but can lead to awesome photos.
Travel Photography Tips – Culling and Editing
The Edit is Where Good Images Can Become Great Images
Post-processing is where you can elevate your images. While capturing a great shot is essential, editing can polish a photo up into something truly special by subtly highlighting the subject, removing a distraction or enhancing the colour and contrast.
Photo editing is a huge topic that is beyond the scope of this blog post, but in the meantime, here is a great beginner’s guide from Photoworkout.
Happily, gone are the days of editing photos in dark rooms full of stinking chemicals. You are now free to experiment with different editing techniques to your heart’s content.
Beware Over-Processing Your Travel Photos
Over-processing is the number one mistake new photographers make. Some photographers never grow out of it.
My rule is simple: if the first thing I notice when I look at an image is its processing, it has failed.
Editing an image should be a subtle, delicate process that accentuates the composition you created when you first took the photo.
Typical examples of over-editing are overdone filters, selective desaturation, over-contrasty black and white photos, HDR horror, and by far the worst of all, the saturation slider.
Saturation is a useful tool when applied very subtly, but the temptation to push it too far is too strong for many photographers. A landscape photograph shot should not look like it was taken at Chornobyl. Grass should not be luminous green. The sky should not look like boiling soup.

Make it stop…..
Review and Sort Your Photos Each Day
Reviewing your photos as soon as possible after shooting or at the end of the day is an important part of the learning process. It allows you to see what did and did not work, what areas you can improve on, and what you could try tomorrow.
Also, daily sorting helps you curate your best shots for editing and sharing. Imagine coming home with thousands of images to sort through! Far better to do it when they are fresh in your mind. There are many different ways to sort images, either using a star rating system or colour coding.
I use a very simple star system in Lightroom, 1 star is OK, 2 stars is a great shot and 3 stars is something rare and special. I have used this since I started, which means I can go back to images I shot eight years ago and instantly find the photos I deemed to be worth keeping.
As a wedding photographer, may 30% of my images receive a rating. When travelling, barely 2% do!

Make Sure Your Images Are Backed Up
Keeping your photos secure can be tricky when travelling, especially when you don’t have reliable access to a fast internet connection. I run through some ways to keep your photos and videos safe here.
Any Travel Photography Tips I Have Missed?
I truly hope you have found the above useful. I won’t lie; when I sat down to write this article, I had no idea of its scope but it has been a genuine pleasure to put together.
If you think I have missed anything or have any other suggestions, please leave me a comment below!
